
Master 5 easy tips for painting plastic playhouse safely & fast. Achieve vibrant, durable results with proper prep, primer, and protective coating.
Introduction
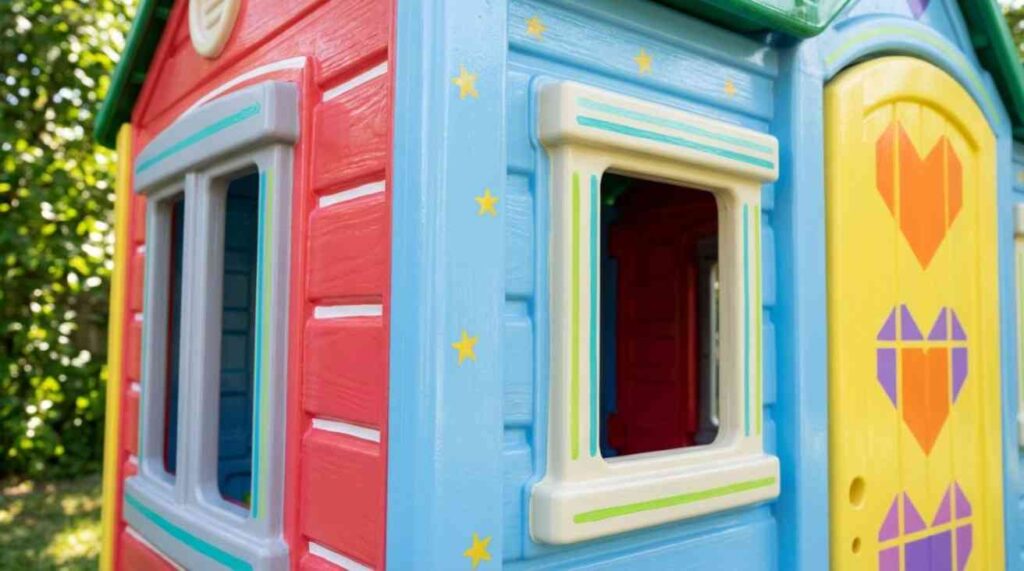
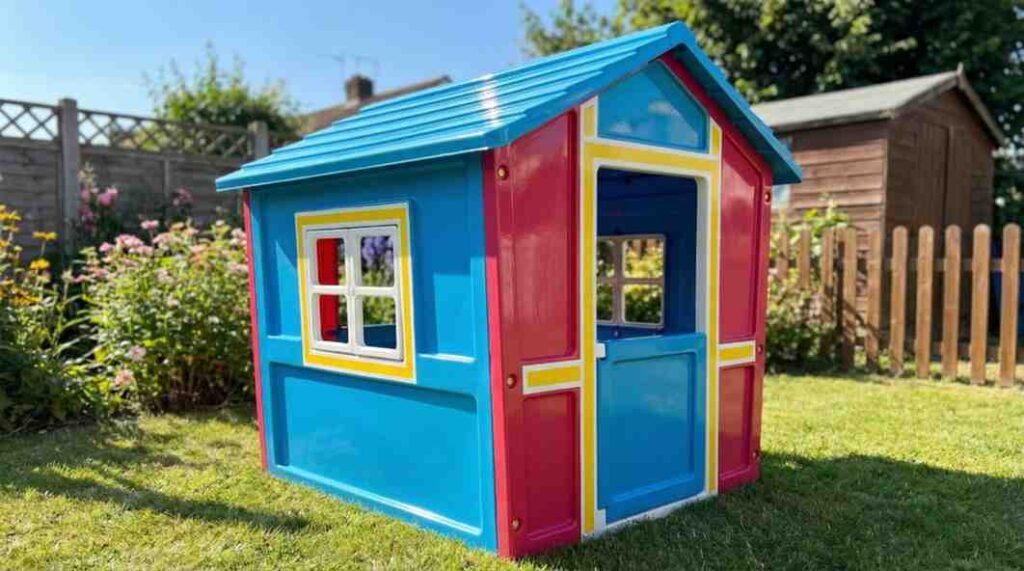
Painting plastic playhouse is one of the quickest ways to refresh your backyard and turn it into a bright, durable, kid-safe space. With proper prepping and plastic-friendly spray paint, you can prevent peeling, improve weather resistance, and achieve a long-lasting, vibrant DIY plastic playhouse makeover that stays beautiful for years.
Creative Ideas & Color Inspiration
| Idea / Theme | Details & Tips |
|---|---|
| Bright, Playful Colors | Use reds, blues, yellows, and other vivid shades to evoke energy and excitement for kids. |
| Modern, Chic Designs | Pair neutral base colors with contrasting trims for a stylish and contemporary look. |
| Seasonal or Themed Accents | Add stencils, decals, or seasonal paint touches for creative flair and festive vibes. |
| Experimentation & Creativity | Try different paint patterns, textures, or color combos to make your DIY plastic playhouse truly one-of-a-kind. |
| Child-Friendly Appeal | Thoughtful color schemes and playful accents make your backyard project more enjoyable and visually appealing for children. |
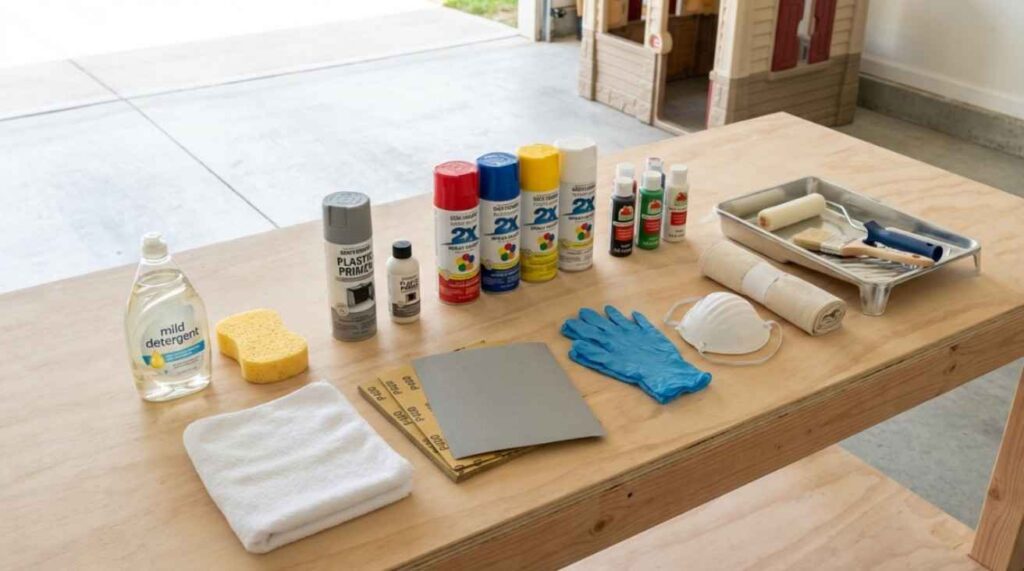
Optimized Materials & Tools You’ll Need
Gathering the right tools and materials is essential for a smooth, long-lasting result when painting plastic playhouse projects.
Cleaning Supplies: Mild detergent, sponge, and a soft cloth to remove dust, grease, and grime for a clean surface.
Surface Prep Tools: Fine-grit sandpaper (400–600 grit) and an optional degreaser to improve paint adhesion on plastic.
Paint & Primer: A high-quality plastic primer paired with spray paint for plastic playhouse or durable acrylic paints made for toys.
Protective Gear: Gloves and a mask to ensure safe and comfortable painting.
Protective Covers: A canvas drop cloth or tarp to shield surrounding areas from overspray.
Proper prepping, priming, and using plastic-safe materials ensures the paint bonds firmly and stays vibrant for years of outdoor use.
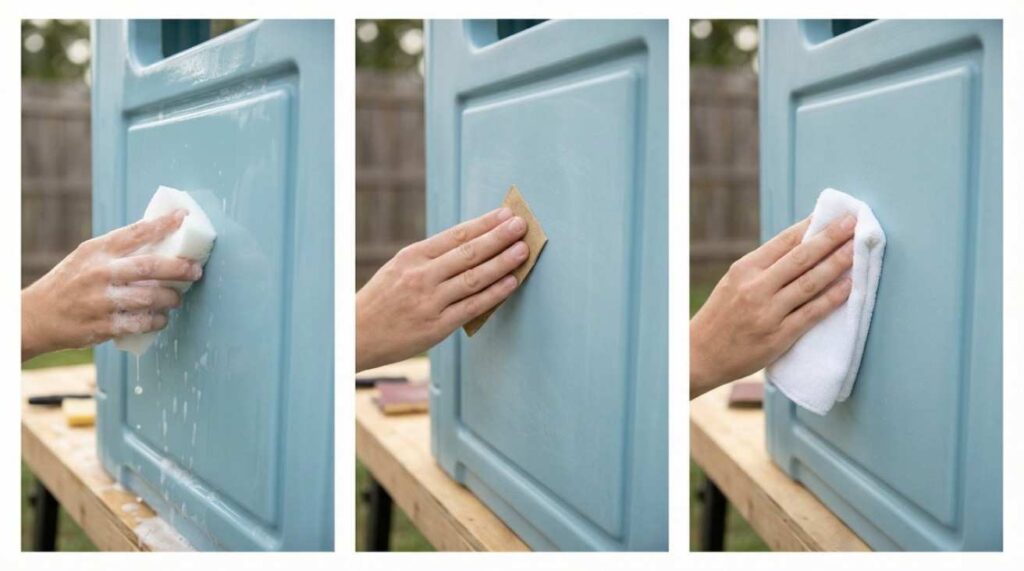
Step-by-Step Prep: Cleaning & Sanding
Preparation is the foundation of a durable, smooth, and professional-looking paint job.
1. Clean Thoroughly
- Remove dirt, grease, and residue to ensure strong paint adhesion.
2. Dry Completely
- Any moisture can block adhesion and cause peeling or flaking.
3. Lightly Sand the Surface
- Use fine-grit sandpaper to roughen glossy plastic and improve paint bonding.
4. Remove All Dust
- Wipe sanding residue with a clean or tack cloth for a flawless finish.
Advantages of Painting Plastic Playhouse
| Advantage | Details & Benefits |
|---|---|
| Enhances Appearance | Transforms a dull or faded playhouse into a bright, vibrant, and kid-friendly space. Makes your backyard visually appealing and inviting for children. |
| Protects Against Weather | Shields plastic from sun, rain, and harsh outdoor elements, preventing fading, cracking, or brittleness. Ensures the playhouse stays durable year-round. |
| Increases Durability | Proper prep, primer, and plastic-friendly paint create a long-lasting, scratch-resistant finish that resists peeling and chipping. |
| Personalization & Creativity | Enables custom colors, themes, stencils, and playful designs, allowing you to personalize your DIY plastic playhouse and make it unique. |
| Cost-Effective Refresh | A simple, affordable makeover that revives old or worn plastic playhouses without the need for costly replacements. |
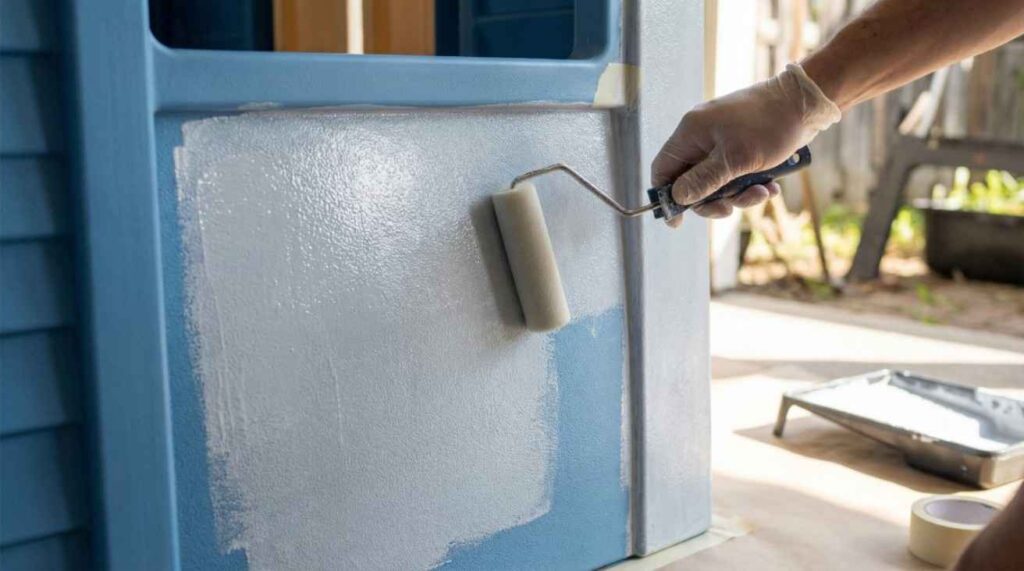
Applying Primer for Best Adhesion
Why Primer Is Essential
- A high-quality plastic primer is crucial for strong adhesion when painting plastic playhouse surfaces.
- Prevents peeling and helps the paint bond to slick plastic.
- Provides superior durability compared to paints with “built-in adhesion.”
How to Apply Primer Correctly
- Apply thin, even coats over the entire surface.
- Pay extra attention to edges, corners, and textured areas.
- Allow each coat to dry fully before adding another.
Benefits of Using Primer
- Ensures the paint adheres smoothly and evenly.
- Improves weather resistance and long-term durability.
- Makes colors appear brighter, richer, and more uniform.
Final Result
- Priming is a small step that delivers huge, long-lasting results, creating the perfect foundation for a beautiful transformation.
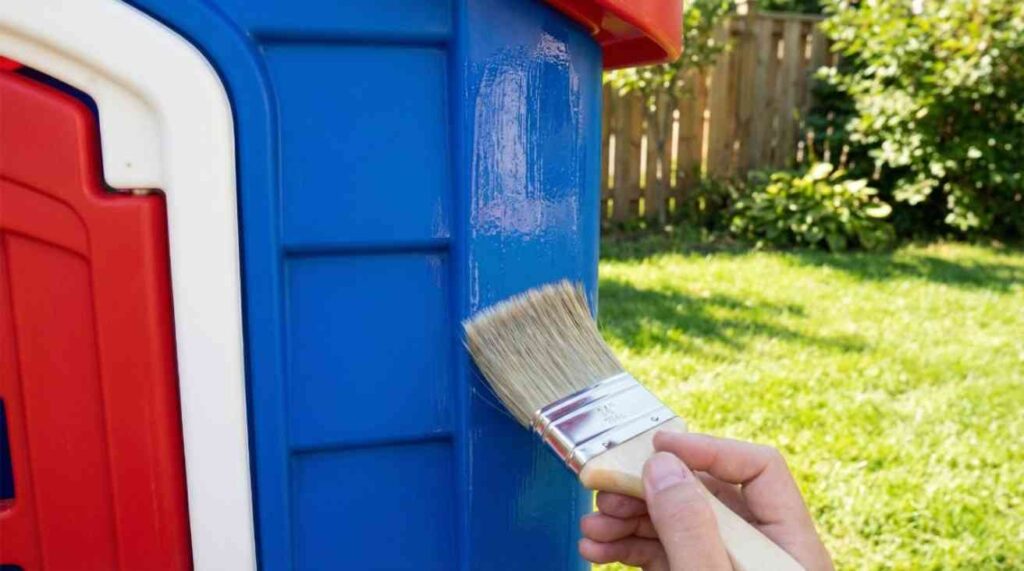
Painting the Playhouse – Techniques & Tips
| Step / Tip | Details & Instructions |
|---|---|
| Use the Right Paint | Use spray paint for plastic playhouse or high-quality, plastic-friendly paints designed for outdoor use to ensure durability. |
| Spray Technique | Hold the can 10–20 cm away and use light, sweeping strokes to prevent drips and streaks. |
| Apply Thin Coats | Several thin coats are better than one thick coat; allow each coat to dry fully before the next. |
| Detail Work | Use small brushes for trim, edges, and decorative accents to create crisp, professional-looking finishes. |
| Weather Considerations | Avoid painting in extreme heat, high humidity, or wind for the best adhesion and smooth finish. |
| Creative Touches | Add playful accents, vibrant colors, or patterns to transform a simple playhouse into a fun, eye-catching backyard centerpiece. |
| Professional Tips | Incorporate proper prep, primer, and layering techniques to achieve long-lasting, professional results. |
Sealing & Protecting Your Work
Sealing your painted plastic playhouse is a crucial step to protect your hard work and extend its lifespan.
Apply a UV-resistant clear topcoat to safeguard against fading, chipping, and weather damage. This simple step ensures your playhouse remains vibrant and durable for years.
- Number of Coats: Typically, 1–2 coats are sufficient for full coverage across all surfaces.
- Curing Time: Allow 24–48 hours before children use the playhouse to ensure the paint and sealant cure completely.
- Enhanced Durability: Sealing makes your DIY plastic playhouse resistant to sun, rain, and everyday play.
- Visual Appeal: A protective topcoat not only preserves the finish but also keeps the playhouse visually stunning and safe for children.
Proper sealing is a small effort that delivers long-lasting protection and professional-looking results for your backyard centerpiece.
FAQs:
Q1: Can you paint a plastic playhouse without primer?
A1: While some paints claim built-in adhesion, using a plastic primer ensures longer-lasting results and prevents peeling or flaking, especially on slick surfaces.
Q2: What paint works best for plastic playhouses?
A2: Spray paint for plastic playhouse or plastic-friendly acrylics provide smooth coverage, superior weather resistance, and durable, vibrant finishes.
Q3: How long does paint last on a plastic playhouse?
A3: With proper cleaning, sanding, priming, multiple thin coats, and a protective topcoat, paint can last 2–5 years, depending on exposure and usage.
Q4: How do you prevent paint chipping on plastic?
A4: Ensure thorough prep, priming, and applying thin coats, followed by a UV-resistant topcoat. This combination maximizes durability and keeps colors vibrant.
Q5: Can you repaint an old plastic playhouse?
A5: Yes. By following proper cleaning, sanding, priming, painting, and sealing techniques, you can refresh faded or worn playhouses effectively.
Conclusion:
Painting a plastic playhouse is a rewarding DIY project that transforms your backyard into a fun, colorful, and safe space for children.
- Careful preparation and plastic-friendly paints ensure smooth, lasting adhesion.
- Multiple thin coats and a UV-resistant topcoat protect against fading, chipping, and weather damage.
- Creative color choices, stencils, and accents allow you to personalize the playhouse and make it visually striking.
With attention to detail, quality materials, and proper techniques, your painted plastic playhouse becomes a durable, vibrant centerpiece of outdoor fun for years to come.


